episode 3
your phone
is better than
it looks...
Welcome to the ultimate guide to recording video at home.
I'm a YouTuber turned freelance video producer now working with some of the UK's biggest brands. I've gathered my expertise into this quick reference guide for anyone trying to film at home: learn the basics of video and lighting and applying my hacks, tips and tricks to optimise your existing devices.
Smartphone cameras are designed to be easy-to-use. With developers spending millions miniaturising tech and automating settings to make great video accessible to everyone... which we then use to record TikToks.
Years of smartphone makers trying to make us buy the new model every year, has resulted with an extremely powerful piece of video kit in our pockets.
A few years ago, those devices reached the professional quality threshold, so now people (like me) regularly use them alongside our big pro cameras on major productions.
1. Back camera is better
Phone manufacturers have concluded we prefer taking pictures of our pets, than ourselves. So the quality of the image from back cameras are usually much better than the front 'selfie' cameras.
That said- using the back camera is more difficult because you often need a work-around to monitor yourself as you record. If you need use the front cam, make sure you've got the settings as high quality as possible, only the very latest models have improved these cameras.
If you want to connect your phone to a display- use a HDMI adaptor or try out screen mirroring. I'd recommend only doing this on the latest phones as it takes a lot of processing power, and recording 4K video is already quite power hungry!
If you're working solo, you often need to be able to monitor yourself to check you're in frame (and recording). There are options to connect your phone to a display... but often the simple solutions are the best. If you have a small mirror, position it behind the phone!
There is no need to shoot at 50fps (or 60fps) even if your phone supports it. This is generally only used for slow motion and can create unnecessarily huge files!
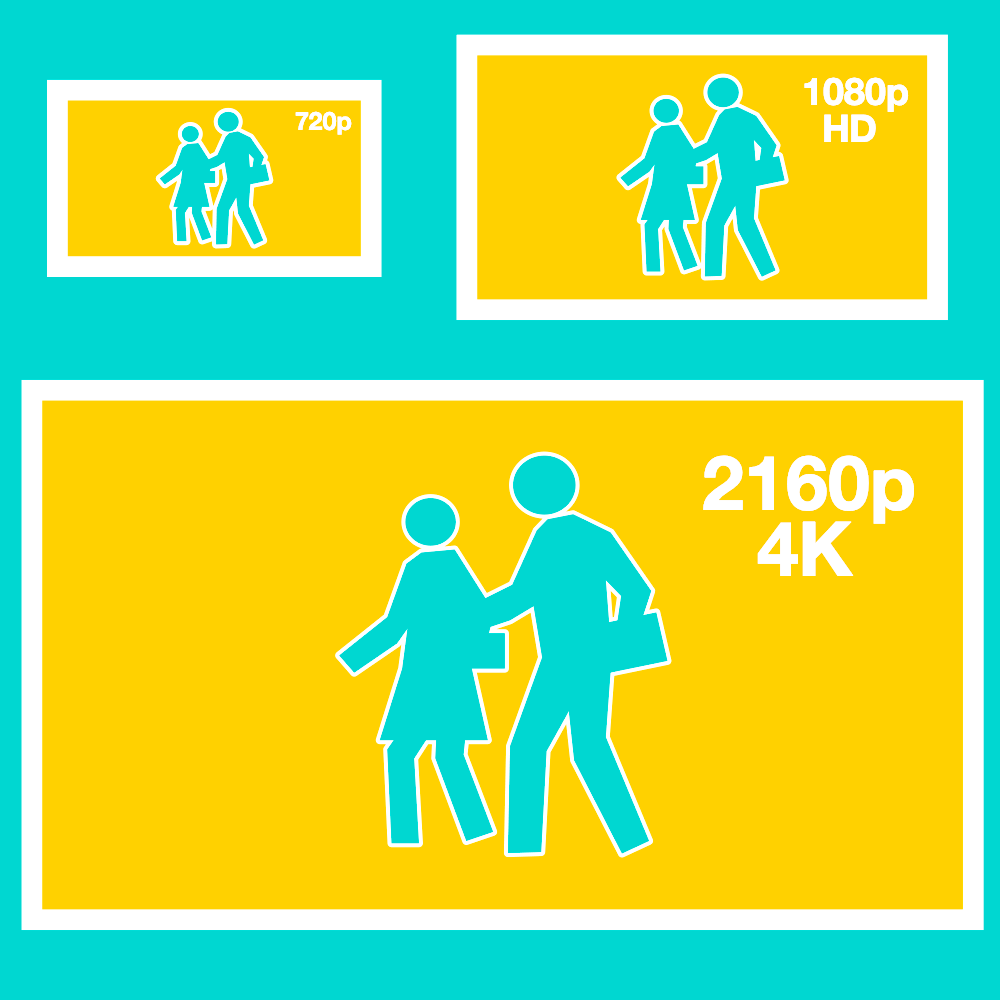
2. Film in 4K 25fps
Smartphone settings are set by default to compromise for a general American user. This balances the file size with quality, which is useful most of the time when recording memories, but not so much for professional videos. As a rule, film in the highest resolution your phone offers and in 25fps rather than 30 (if you're in Europe!)
For Apple devices go to Settings and scroll down to Camera, then:
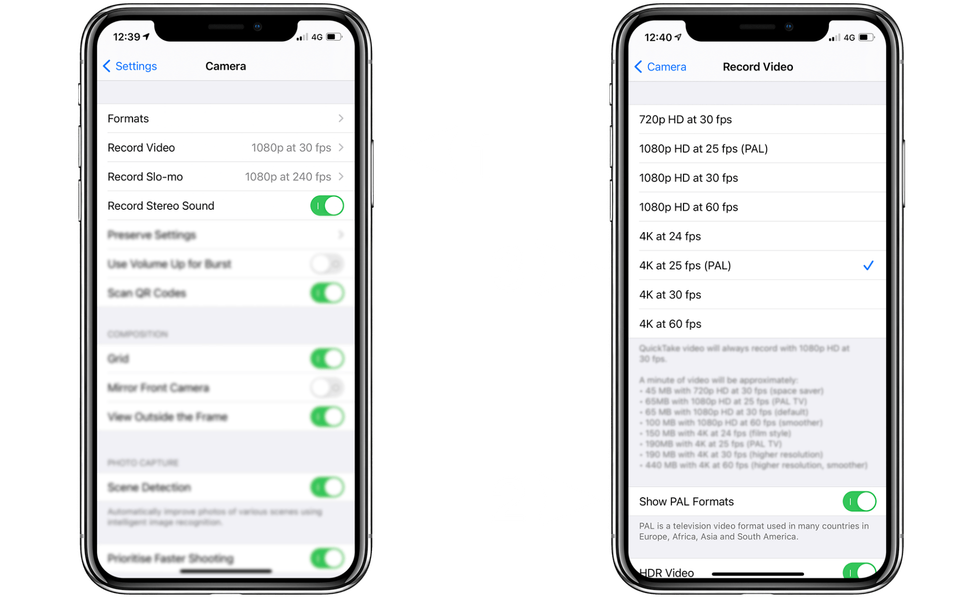
For other devices, look for video settings with terms such as:
PAL - 25 fps - Video Resolution: Highest - 4K - 3840 x 2160 - 16:9
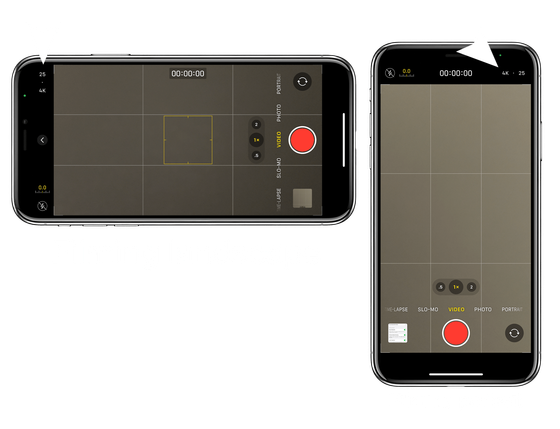
While filming, you can check which resolution and frame rate you are using in the top corner.
If you flip between front and back cameras, the resolution may automatically change as some older phones only have 4K cameras on the back.
To film landscape you may need to turn off portrait lock.
3. Get the camera to eye level
Cameras flatten your beautiful 3D self into an often unflattering 2D image. To give your vanity a fighting chance, set the height of the camera as close as you can to eye-level.
Position yourself in the frame so your eyes are roughly one third down from the top of the screen. A common mistake is to have far too much headroom, or sometimes far too little!
If you have the grid guidelines turned on, the eye-line is represented as the first line down. This works whether you're close up, or far away!
Cheap tripods are great. But I use these flexible arms which attach to a desk or bookshelf. And they're less than £15.
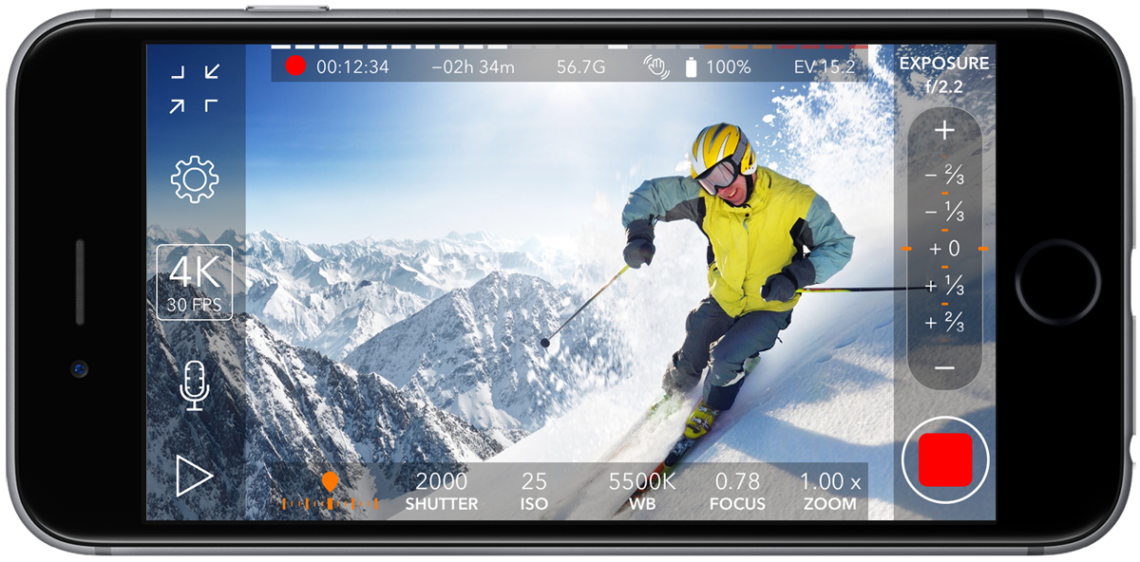
Your phone becomes as DSLR
This is easily my favourite app for filming on a phone. It taps into every setting that your phone usually automates and gives you control over white balance, exposure, focus, shutter speed and even recording format. As pro is in the name, it is designed for users familiar with more advanced camera settings, but I would recommend to anyone looking to buy a camera to get this app instead.
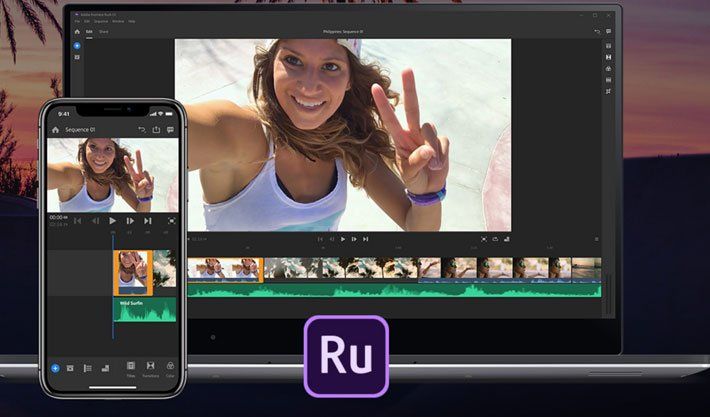
Edit on your phone
If you're working with video you may be familiar with the Adobe creative suite apps such as Premiere and Photoshop. As more and more people need to edit content on their phones to post on social media, Adobe created this app to bring more advanced editing to your device. It can be a great option for trimming down, combining, or splitting clips to make them easier to send on.
I exclusively use those other two apps- but I wanted to shout out some other video apps I have on my phone which you may find helpful...
- GoPro - great editing software on a computer, and free! But I find the phone app irritatingly over-automated...
- Clips - Apple's own little video editor, very basic and can compress video secretly when you don't want it to.
- Facetune video - makes videos look great! But only use if you know what you're doing, and are making content to go straight out, not via an editor.
4. Download these apps
There are some great apps which access some secret camera settings inside your phone, creating even better footage.
5. Plan to send the big files
So you got all the settings right and have a great high quality video... but now it is stuck on your phone. Ask yourself which one of the following applies: